Hello. Iingo here. I'm going to teach you how to Splice Comics or pictures in general today.
Have you ever wanted to be a comic artist and want to share your work online? Well here are two examples of great websites to host your creative comic!
Tapastic and LINE Webtoon
A Little History on Tapastic and LINE Webtoon
Uploading your comics on the sites
Even with that, you still have a size limit for both.
Tapastic: 940 x 4000px you can use PNG AND JPG FILES
Webtoon: 800 x 1280px YOU CAN ONLY USE JPG FILES (unless if you're a featured artist)
What if you're uploading a piece of the comic but it exceeds over the size limit?
THIS IS WHEN THE SPLICING COMES INTO PLAY!
Since Webtoon has a smaller pixel size, we will use that as an example.
You have to use Adobe Photoshop to splice comics.
Though splicing means to unite or join together in other terms, splicing on Photoshop means to divide segments of your picture. This is an easier method than cropping your pictures and possibly messing up the format of your comic.
Let's go to Webtoon!
Uploading Comic pages on Webtoon
Once you first open Webtoon, look at the far right and you'll see an icon that says Publish.
 You have to have either a Twitter account, Facebook Account or a LINE account to upload on Webtoon while Tapastic you can use your email or Facebook instead.
Next, it tells you to either select a series or create one. If you haven't already used Webtoon before it'll tell you to create your first series.

Now like other comic websites, the next thing that you want to do is to give a title to your comic series, select the genre, and give a summary.
 Even your Comic Title Image needs to be a JPG and 436 X 436 long.
Now time to upload the comics
Here's the most important part of this tutorial.
Now that you've written your title and summary of your comic, it's now time to start adding the pages. Of course like most comic websites, you give a title to the comic chapter.
But then comes the uploading portion.
Again, your comic must reach the limit to 800 x 1280px long.
 You can only upload comics to reach the limit of 20MB. You can see to the right that's highlighted so I would recommend not saving your JPG File to the highest quality if you have a lot of pages. I would recommend the middle to middle high quality.
Here's how the screen looks.

Now let's say you want to start your comic with a long picture with a gradient that will introduce the title. Most comics tend to use a long canvas to show the title or the build up to it.
- Here's an example of a long canvas that wants to show a build up to a title. It includes gradients. This canvas size is 800 x 3809 which is a long canvas.
Once you try to upload it...

Uh oh. The canvas is too long.
Well you already knew that.

Uh oh. The canvas is too long.
Well you already knew that.
But I want to keep the page looking like that without editing the page
This is also bad when you want to post things with words.
Now of course, you can use the cropping tool. However, it isn't the efficient way to do it.
Now of course, you can use the cropping tool. However, it isn't the efficient way to do it.
How to use the splice tool
On Photoshop, go to the tool bar and look for the crop tool (the default setting). Click on the little white triangle next to it and then you will see many options including the Splice tool.


Once you're using the splice tool, drag it over the whole picture, you see a small blue box showing the number 1 and the image icon on the top left corner. Your whole image should also be surrounded by an orange border.


Next, right click over the image (while the splice icon is on) and click Divide Slice. Then it'll show you options to divide horizontally or vertically. In this case for comics, select Divide Horizontally Into and enter how many splices you want. In this case, I would choose either 4 or 5.


After that, you should get this result.
Now you can save it if you want, however, the splices won't take effect if you save regularly. The canvas size will stay the same.
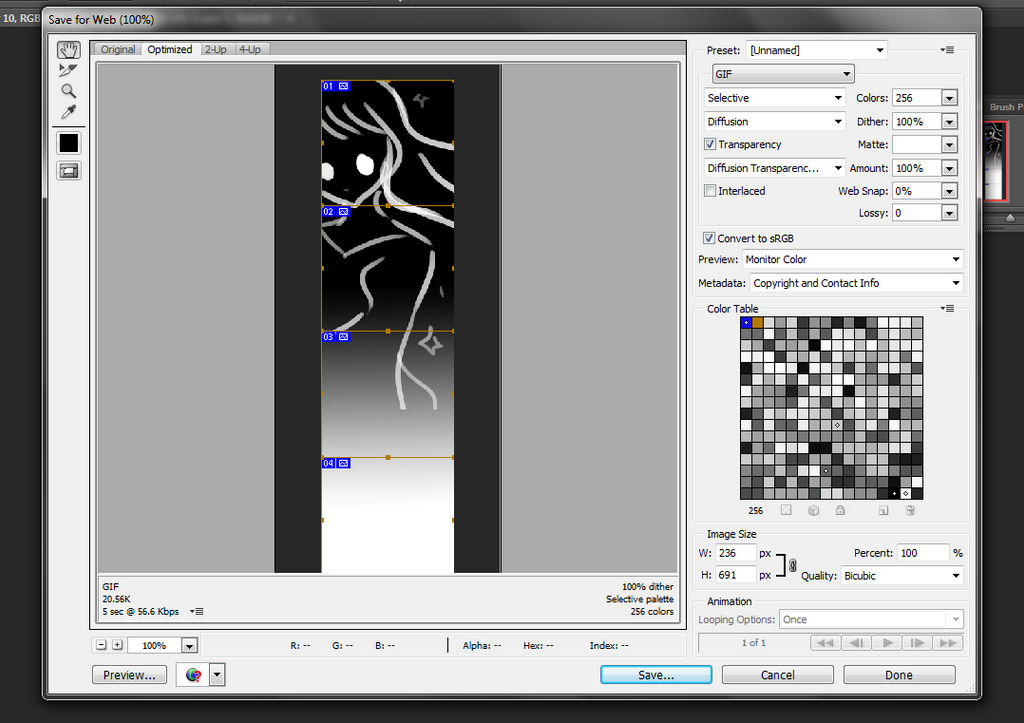
How to save splices is to go to File>Save for Web and this screen should appear

Now you may be thinking, "Isn't this mainly for saving gif images?"
Some of you may not know it, but you can save JPGs, PNGs, and WBMPs as well. Go to the GIF tab and click on the black triangle. You will then see the options to change the file. Click JPEG. From there, you'll be getting different options for the JPEG.

When saving your pages, MAKE SURE THE QUALITY IS EITHER HIGH, MEDIUM HIGH, OR MEDIUM. As said before, you have a limit to how many pages you can put if the MB is high on Webtoon.

Now you can save it if you want, however, the splices won't take effect if you save regularly. The canvas size will stay the same.
How to save splices is to go to File>Save for Web and this screen should appear

Now you may be thinking, "Isn't this mainly for saving gif images?"
Some of you may not know it, but you can save JPGs, PNGs, and WBMPs as well. Go to the GIF tab and click on the black triangle. You will then see the options to change the file. Click JPEG. From there, you'll be getting different options for the JPEG.

When saving your pages, MAKE SURE THE QUALITY IS EITHER HIGH, MEDIUM HIGH, OR MEDIUM. As said before, you have a limit to how many pages you can put if the MB is high on Webtoon.

Then you can now save your pictures to wherever, and they should all be in separate pieces in a folder called Images. However, there may be times when some of the image splices will show the image as a gif image.


To fix that, go back to the Save for Web page and select the whole image in the box. Don't forget to be on the JPEG tab. Make sure you can see it all by clicking the - or + at the bottom left of the Save for Web page.
You're going to have to Save it again and you can save it to the same folder. It will just save it as a copy. Here's what you'll get if you follow the directions

Looks like it worked this time!
You're going to have to Save it again and you can save it to the same folder. It will just save it as a copy. Here's what you'll get if you follow the directions

Looks like it worked this time!
After you've uploaded all the pages you want, you can preview it, save it/publish later, or publish the comic page.

Tapastic's Publishing tab is on the top right corner if you cannot see it.

I hope this tutorial helped you out! Thank you for reading.

Tapastic's Publishing tab is on the top right corner if you cannot see it.

And now, the whole page should be shown without any white lines seeping through.

To find the upload comics on Tapastic, go to the upper right corner to your icon (if you have an account) and click on it.
Once you see Dashboard, click on it and then it'll show you options to create a comic. Just like Webtoons, if you haven't use Tapastic before, it'll say to create your first series.
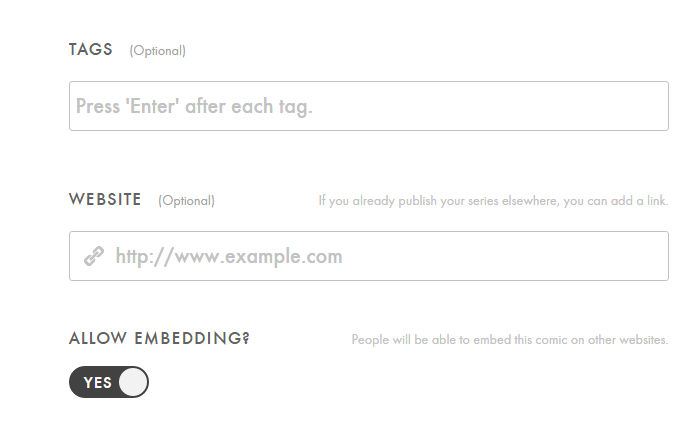
You have more options with Tapastic than Webtoon. For example, you can add a banner to your comic. It looks like what Facebook does but more for your comics. You can also add ad banners, tags, website urls, and more.
The thumbnail size for your title must be 300 x 300px
On Webtoons, you can have an unlimited amount of pages as long as it doesn't reach 20MB.
On Tapastic, you can upload any size amount, HOWEVER, you can only upload up to 40 pages for the comic. So be wise on how many pages you submit.
And remember, on Tapastic, the size limit can go up to 940 x 4000px.

Things to understand with Tapastic.
To find the upload comics on Tapastic, go to the upper right corner to your icon (if you have an account) and click on it.
Once you see Dashboard, click on it and then it'll show you options to create a comic. Just like Webtoons, if you haven't use Tapastic before, it'll say to create your first series.
You have more options with Tapastic than Webtoon. For example, you can add a banner to your comic. It looks like what Facebook does but more for your comics. You can also add ad banners, tags, website urls, and more.
The thumbnail size for your title must be 300 x 300px
On Webtoons, you can have an unlimited amount of pages as long as it doesn't reach 20MB.
On Tapastic, you can upload any size amount, HOWEVER, you can only upload up to 40 pages for the comic. So be wise on how many pages you submit.
And remember, on Tapastic, the size limit can go up to 940 x 4000px.


